In October, I traveled to Japan for a total of 15 days and I will kick off the first post with the pre-planning for the trip.
Traveling in Japan and comparing it to Taiwan, I certainly felt that all the extra planning that we did for the Japan trip really helped us. Not only because we were planning to cover so many cities over a period of 15 days, but also for the fact Japan is so huge and it is really not a place you can just walk around and expect to walk into the “correct-spots”. Of course not everything went according to our plans (e.g. having to shift plans around cause the tickets were sold out)
In short, over a period of 15 days, we visited around 16 Towns/ Cities, went on 2 international flights, 1 domestic flight, countless numbers of trains and subways including one overnight train.
Our 15 day Japan itinerary for this ambitious trip.
Day 1 | Oct 21: Changi Airport, Taoyuan International Airport, Narita Airport, Kyoto (Nijo, Gion)
Day 2 | Oct 22: Kyoto (Fushimi Inari, Kawagoe Fire Festival)
Day 3 | Oct 23: Himeji, Mount Shosha, Kinosaki-Onsen
Day 4 | Oct 24: Osaka (Osaka Namba)
Day 5 | Oct 25: Nara, Kobe
Day 6 | Oct 26: Kyoto (Arashiyama), Osaka (Shinsekai)
Day 7 | Oct 27: Kansai Airport, New Chitose Airport, Otaru, Sapporo
Day 8 | Oct 28: Lake Toya, Hakodate
Day 9 | Oct 29: Noboribetsu, New Chitose Airport, Express Hamanasu
Day 10 | Oct 30: Aomori, Tokyo (Ueno)
Day 11 | Oct 31: Tsumago, Magome
Day 12 | Nov 01: Kawagoe, Tokyo (Tokyo Station, Ginza, Yurakucho)
Day 13 | Nov 02: Tokyo (Tsukiji Fish Market, Shinjuku)
Day 14 | Nov 03: Tokyo (Harajuku, Shibuya)
Day 15 | Nov 04: Narita Airport, Taoyuan International Airport, Changi Airport
Before starting on the trip proper, here are some traveling tips that really helped us along the way.
Budget
Budget will always be one of the main issues when traveling in Japan. Known as one of the more expensive countries to travel in Japan, we managed to complete this whole trip in slightly under SGD $3200
Here is the rough breakdown of where the SGD $3200 went into.
Flights (Scoot Airlines & Peach Airlines) – SGD $370
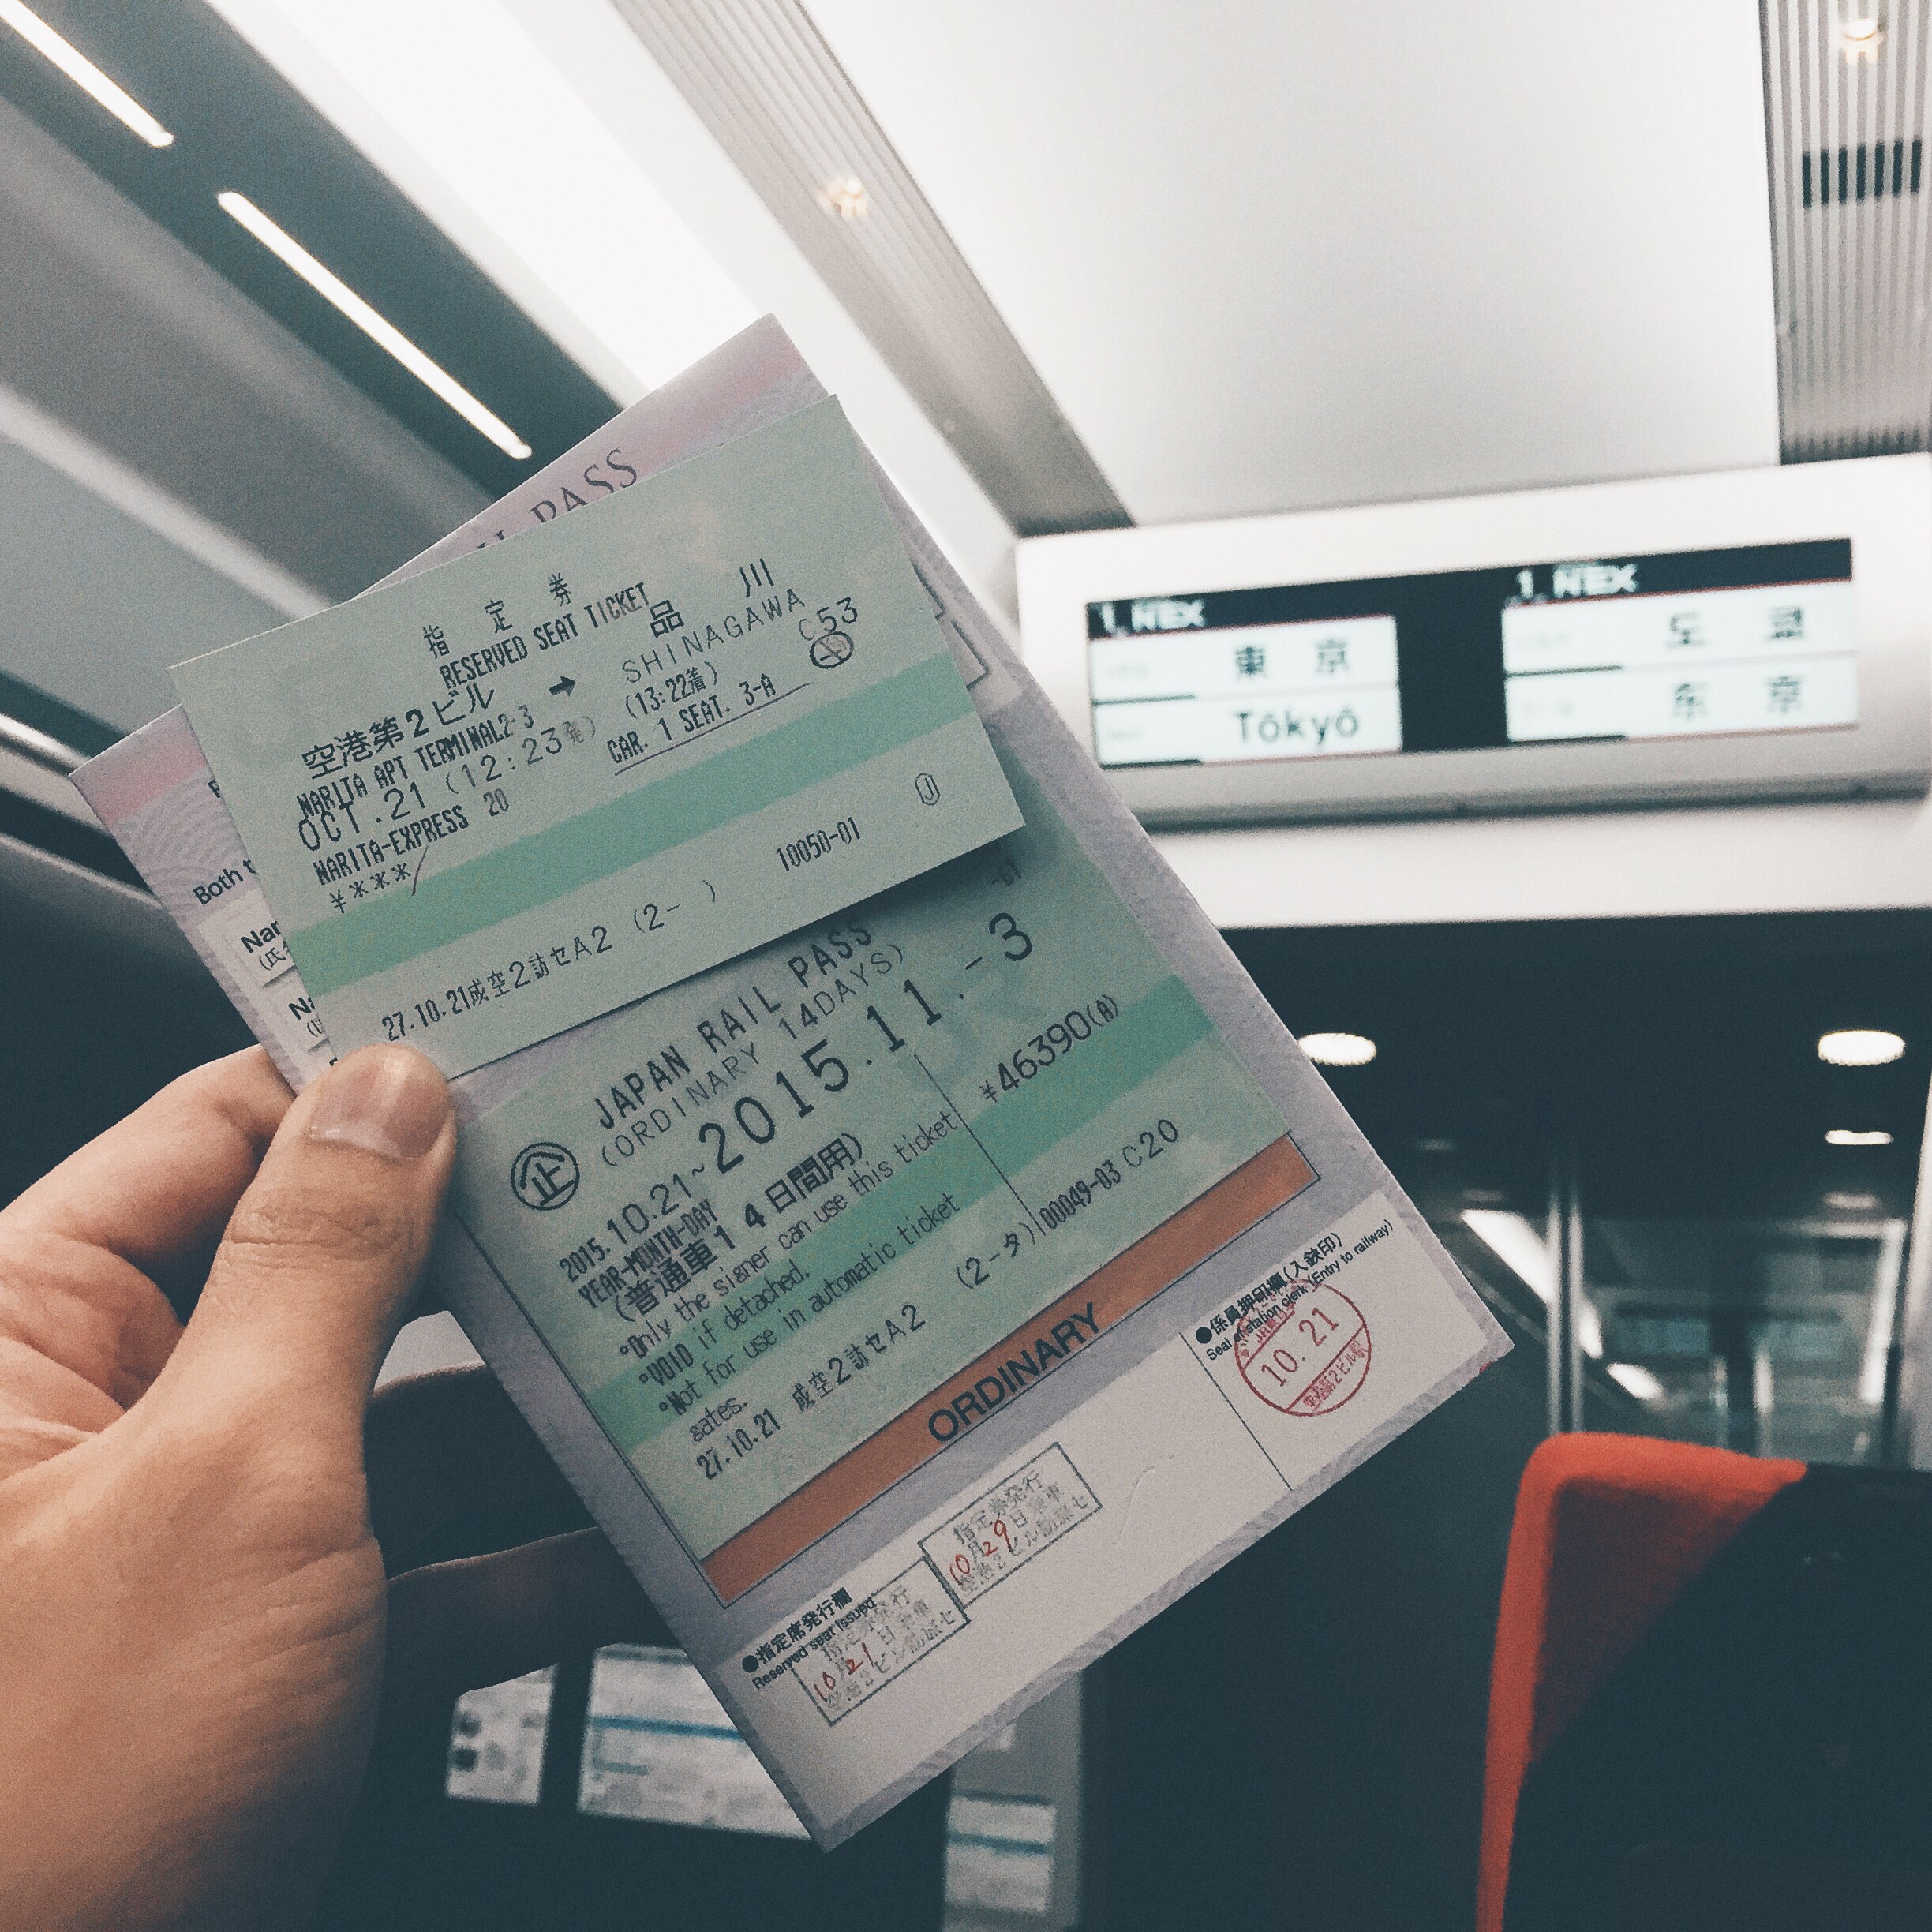
JR-Pass (14 Days) – SGD $530
Accommodations (A mixture of Airbnb and Hotels) – SGD $600
Pocket Wifi (Global Advanced Communications) – SGD $50
Travel Insurance (Aviva) – SGD $46
Cash (Converted to YEN) – SGD $1600
*All amount has been rounded up for easy reference.
As you can see, other than cash that was brought to Japan, majority of the budget went towards accommodations as well as the JR-Pass.
The decision to bring SGD $1600 cash was based on the “formula” of spending around SGD $100 a day with an extra SGD $100 as emergency money.
We didn’t spend all of the SGD $1600 and we returned with around SGD $150 left. Most of the cash went towards our food cost. Initially we thought that we would be living minimally with that budget, considering what we have heard and read on the blogs, but after the first two days, we realised that we were able to live rather comfortably and even splurge quite a fair bit on our food expenses.
Transport
Depending on the places that you will be visiting in Japan, there are several types of JR-Passes and even Subway passes that you can consider. The whole nation JR-Pass is the most expensive of the lot as it covers all JR Operated Train across the whole country. As we were covering a huge part of Japan, we decided on getting the 14 day JR-Pass and planned our entire trip so that we can best make use of the JR-Pass.
Do note that JR Pass needs to be bought outside of Japan. What you buy is a receipt that you will exchange for the actual JR Pass at the JR Pass office at the Airport. The JR-Pass will only cover trains operated by JR-Rail.
Hyperdia (www.hyperdia.com) was a huge life saver as we were able to pre-plan train journeys as well as map-ing out how we are going to get from places to places. We started planing for the trip before October and in October, we realised that there was a new train schedule that was updated and we had to double check all our previously planned route. There were some changes, but majority of them were still within the margin for error.
Visitors in Japan need to take note that there are different types of train/ subway. Namely the “Rapid Express”, “Limited Express” and “Local Trains”. Local Trains will basically stop at every stop. Limited Express and Rapid Express trains only stop at certain stations. So before boarding, do check on Hyperdia if the station you are heading towards is served by which type of train.
As we will be flying in and out of Japan via Narita Airport, this added quite a limitation as to our traveling options in order to reduce traveling time. It is certainly a better idea to travel in and out of Japan via different Airports to save you the trouble of making a u-turn.
Domestic flights are a possible option that one can explore if the you intend to travel cross country without making any stops in-between. In fact, when booked earlier, the cost of the domestic flights is cheaper than the JR-Train if not covered by the JR Pass. We decided to take a domestic flight from Kansai Airport to New Chitose Airport to save the one day traveling time if we were to travel via JR-Train. The cost of this flight came to under SGD $70 after taxes.
Mobile Wifi
Having mobile wifi was a huge saver for us. Other then checking for training timing and routes, we also used it alot when trying to get from places to places using Google Maps and also relying alot on Google Translate. If you do not know, download the Google Translate app on your phone before you go Japan. There is this option of allowing you to take a photo of the text and Google Translate will translate it to English it for you. This has helped us from trying to understand the Japanese Menu to figuring out how to operate the electrical appliances in our apartments.
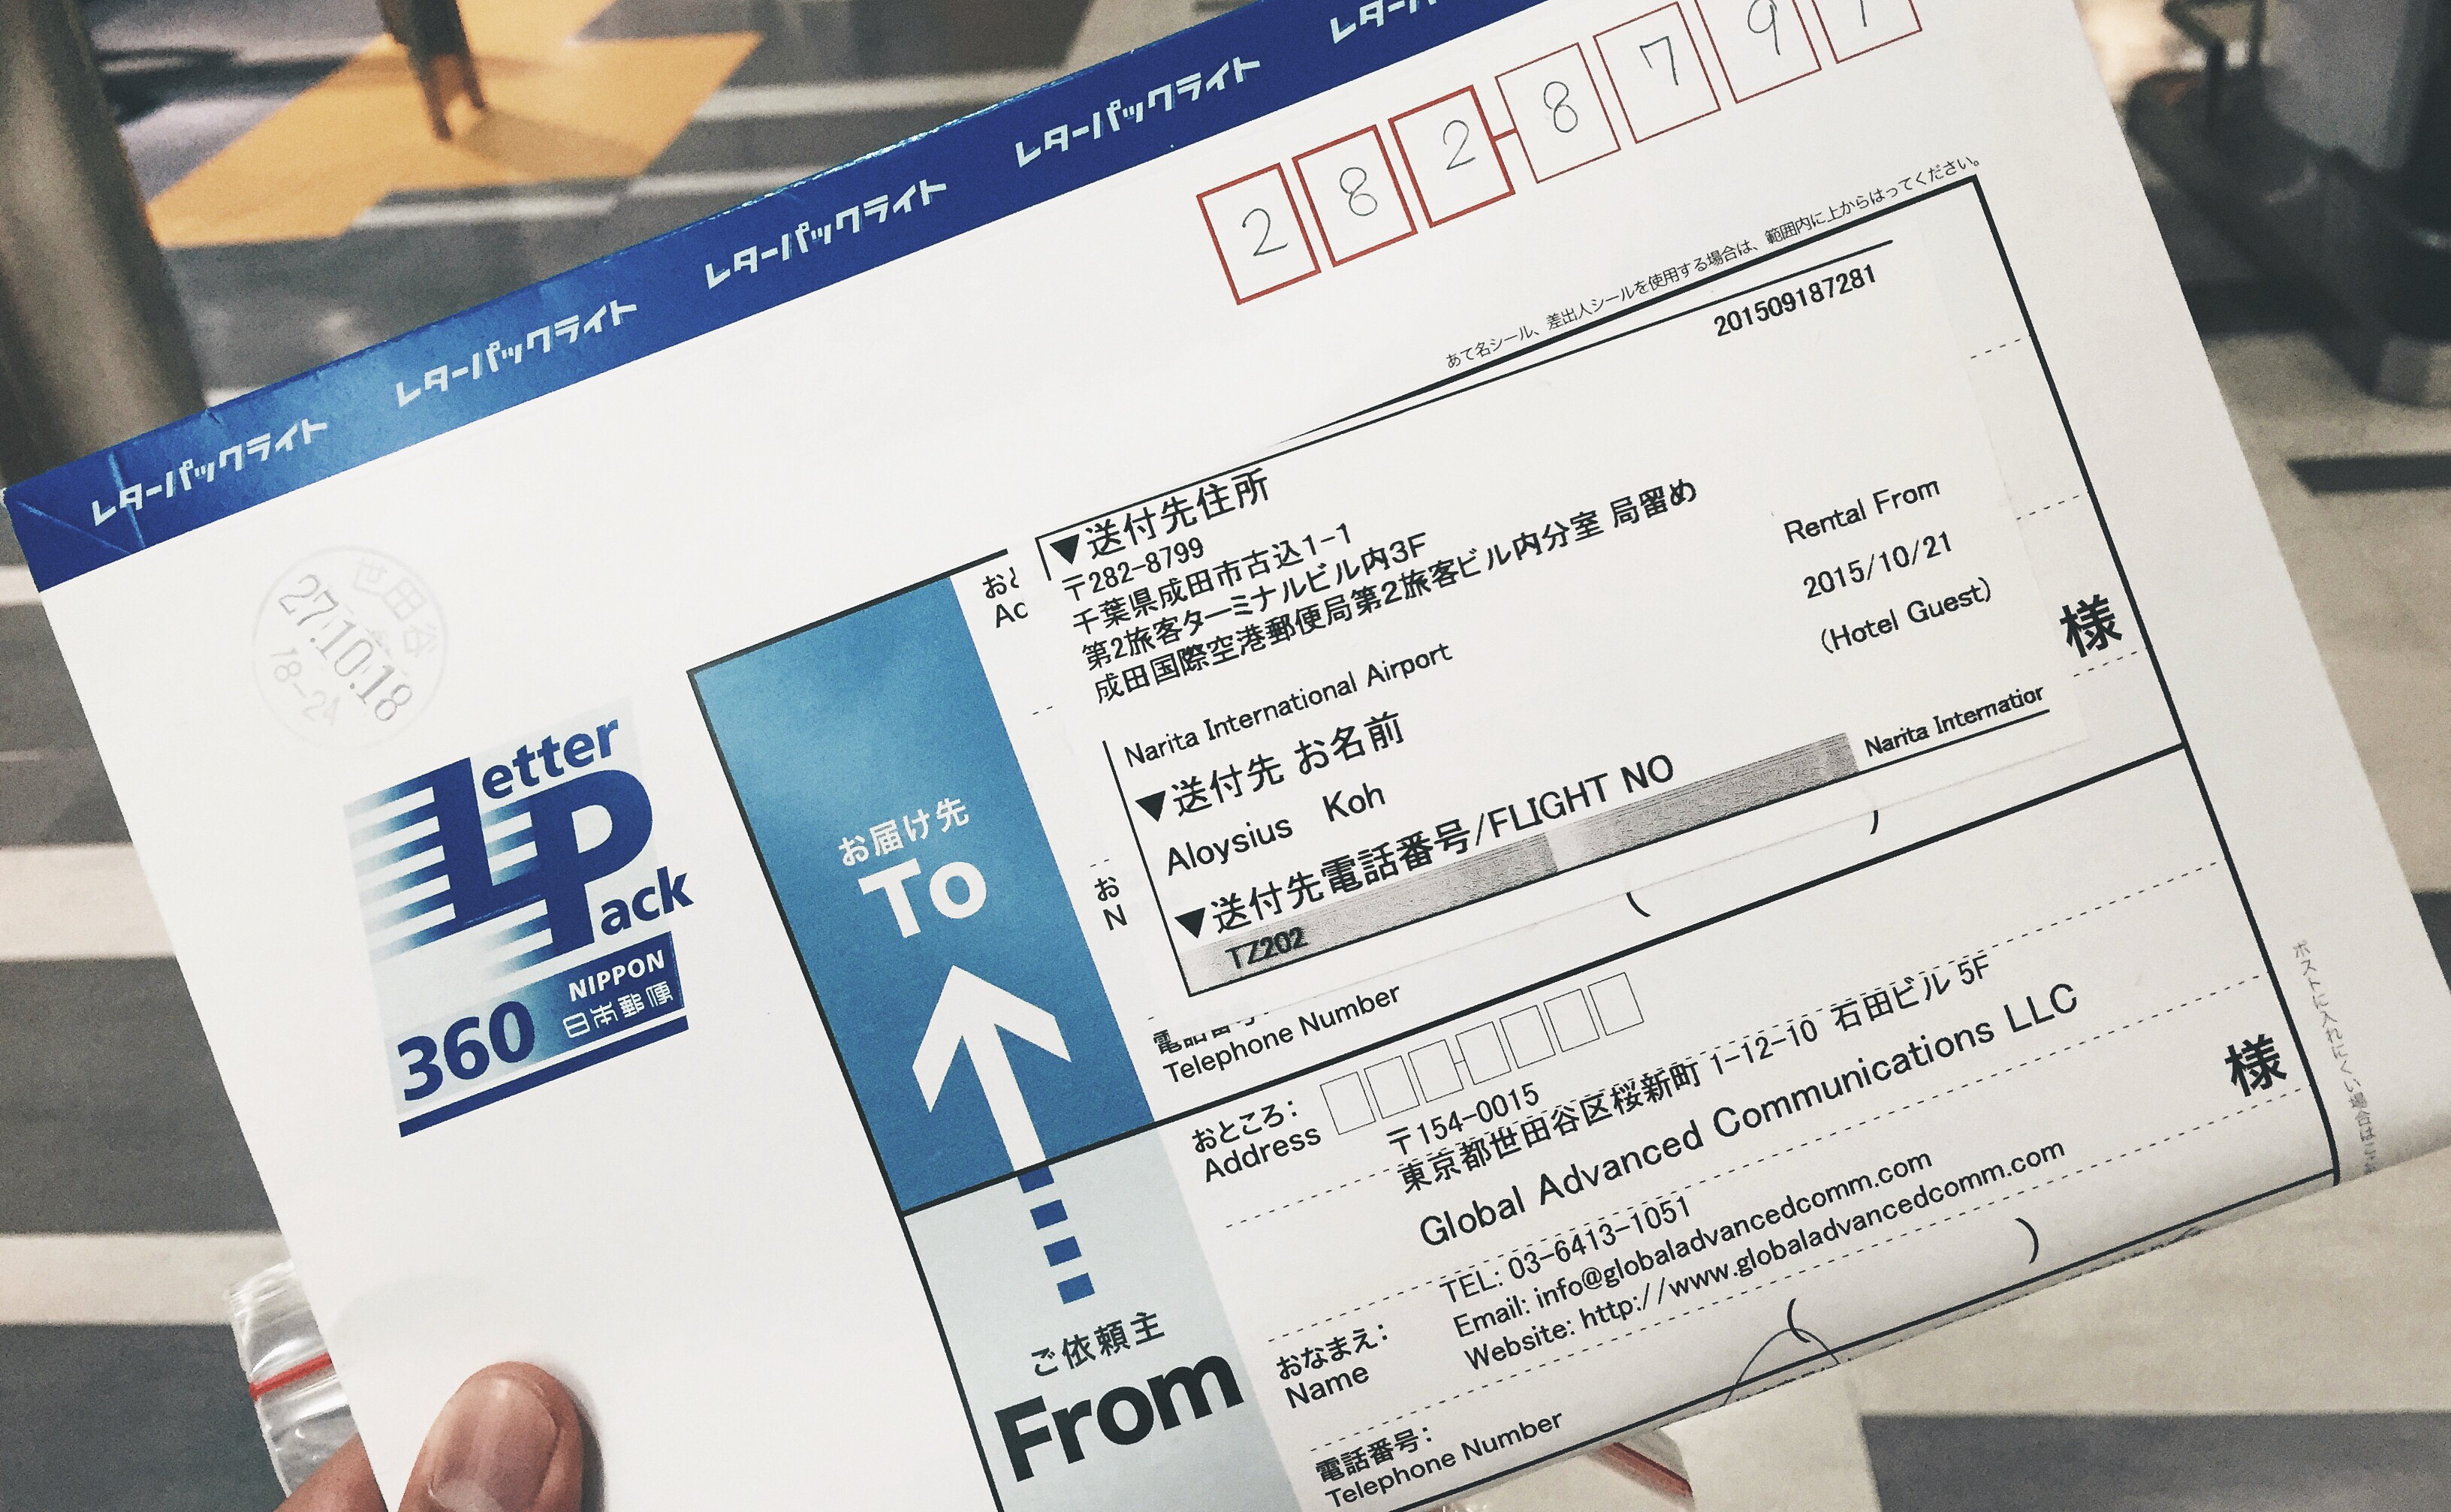
We decided to pre-book our Portable Wifi from Global Advanced Communications (http://www.globaladvancedcomm.com) after making several comparisons online. Reason was that GAC provided the most value for the number of days that we will be traveling in Japan. We took the “Standard Wifi” which has a 75mbps bandwidth with a 10GB Cap on before they start to throttle the data. And even after accidentally backing up the huge 4k videos taken with the iPhone6s onto iCloud, we still did not hit the 10GB Cap at the end of 15 days.
A tracking code was emailed to us 2 days before we departed for Japan and we picked up the portable wifi at the Post Office inside Narita Airport upon arrival. The portable wifi came in a hard case together with the USB Cable and Charger, as well as a return envelope for you to drop off the Portable Wifi at the end of the trip. We didn’t add on the extra battery as we carried along with us a 16,000mah Xiaomi Portable Charger which was more then sufficient for our usage.
Our experience with GAC was great from the booking process to the pick up and return. Though we were not able to stay connected in our whole trip as we covered quite a numerous locations. Cities were generally well covered, but when you start moving out of the city area into the more rural areas such as in Kiso Valley or all those random places that the train will travel pass, the connection might drop out. It was however there when we needed it most.